
How to View your Assigned Routes
This tutorial provides instructions on how to view the assigned routes on your ETHERFAX account, as well as how to export this data.
Info, Notes and Warnings
This details how to find the Toll and Toll-Free routes currently on your ETHERFAX account.
Prerequisites
Before reading these instructions be sure that the following prerequisites are met:
An ETHERFAX account.
An ETHERFAX portal user.
A route.
Instructions
How to view your assigned routes
Sign into the ETHERFAX Client portal at https://clients.connect.etherfax.net.
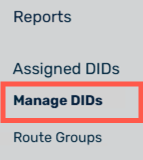
On the left-hand navigation bar, select Assigned DIDs, then click Mange DIDs:
You have now successfully viewed your assigned routes!
How to export a list of your assigned DIDs
Continuing from the steps above, click the download or printer icon of the Assigned DIDs page:

The Printer option will take you to a printing prompt. The Download option will allow you to download this list as a CSV or a PDF.
You have now successfully exported/printed your list of assigned routes!
Ending Notes and Details
The Assigned DIDs page details all routes currently on your account.
If the numbers you are looking to confirm are not present, then they may be on another ETHERFAX account that you possess or ported out as initiated by your organization.