
How to Add your Email Domain for Outbound Email-to-Fax
This tutorial provides instructions on how to create and validate an email domain that is used for email-to-fax through DirectFax Email Services.
Info, Notes and Warnings
At this current time, Outbound DirectFax Email Services are only available for Microsoft 365, Google Workspace and Symantec email systems.
The email reply to validate the domain, as outlined in these steps, must come from a Microsoft, Google or Symantec mail server.
Successful completion of these steps does not mean that email-to-fax is ready.
A connector must be made from your email environment as well. More details regarding this can be found at the end of the article in the Ending Notes and Details section.
There are billing implications to setting up an Email Domain on your account. Please make sure this is squared away to avoid any billing issues.
Prerequisites
Before reading these instructions be sure that the following prerequisites are met:
An etherFAX account.
Must have permissions to create Email Domain entries.
An etherFAX portal user.
The Global Administrator, or
one with the Edit Customer role.
A DirectFax Email Services billing agreement.
The ability to reply to the validation email with a Microsoft, Google or Symantec mail server IP address.
If you are using Microsoft 365:
SPF (Sender Policy Framework) established as per Microsoft’s instructions here.
DKIM (DomainKeys Identified Mail) established as per Microsoft’s instructions here.
If you are using Google Workspace:
SPF (Sender Policy Framework) established as per Google’s instructions here.
DKIM (DomainKeys Identified Mail) established as per Google’s instructions here.
Instructions
How to add your email domain for outbound email-to-fax
Sign into the etherFAX Client portal at https://clients.connect.etherfax.net.
Under Endpoints, select Email Domains.
In the upper-right corner, click the + Email to Fax Domain button.
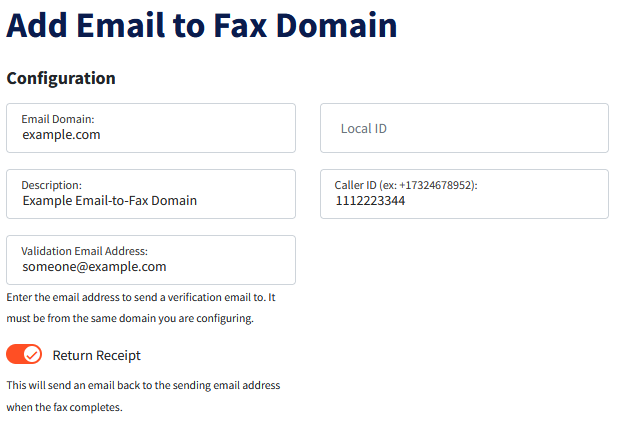
Within Email Domain, enter the domain of your email address.
For example, if an email in this domain is someone@example.com, then you would enter example.com, verbatim. There is no need to include the @ symbol.
Provide details for the Description, Local ID and Caller ID.
The Caller ID and Local ID will be used across all email-to-fax submissions relating to this domain as this is a global setting.
When inputting a Validation Email Address, it will have to be a legitimate address at the same Email Domain.
Using the previous example, we would use someone@example.com.
If you wish to be notified about your outbound fax status when complete, toggle Return Receipt on.
If all looks well, click Save. Below is an example of what our entry looks like:
An email is then sent out to the Validation Email Address.
This recipient will have to reply to that email in order to validate that domain.
If SPF/DKIM are established, along with the reply coming from Microsoft, Google or Symantec mail servers, then your domain will now become validated.
Select the entry by clicking on the domain name or by clicking the vertical ellipses (⋮) in the Action column and then selecting Edit.
Toggle Device Enabled on, then click Save.
Visit the email address used in Step 9. Reply to the validation email.
To confirm if the validation was successful, revisit your entry in Endpoints > Email Domains. If a date is found in the Registered column, then the registration was successful:
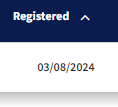
You have now successfully established your email domain with etherFAX!
Ending Notes and Details
Step 8 will fail if SPF and DKIM is not set up within your email tenant.
Please refer to the Prerequisites section for articles on how to address this.
Step 12 will fail if replying with an email system that is not listed in the Prerequisites section.
Please follow the steps here to set up your connectors for email-to-fax.
One set of steps below will need to be completed before being able to send faxes via email:
Microsoft 365 (all users): How to Set Up Your Email Connector for Microsoft Office 365
Microsoft 365 (specific users): How to Set Up Your Email Connector for Microsoft 365 for Specific Users
Google Workspace: How to Set Up Your Email Connector for Google Workspace
Select the knowledge article above depending on the email system you are using, and possibly, on whether you’d like to allow this ability for only specific users.