
How to Set Up Your Email Connector for Google Workspace
This article provides instructions on how to set up your Google Workspace email connector that is used for email-to-fax through DirectFax Email Services.
Info, Notes and Warnings
Without setting up SPF/DKIM, as indicated below, your organization will not be able to use the DirectFax Email Services for outbound faxing.
etherFAX only accepts traffic from that of Microsoft or Google for DirectFax email services. Failure to tailor existing email services around this will result in failures within the fax process.
Prerequisites
Before reading these instructions be sure that the following prerequisites are met:
A user with a Google Administrator role in order to configure these settings.
SPF (Sender Policy Framework) established as per Google’s instructions here.
DKIM (DomainKeys Identified Mail) established as per Google’s instructions here.
Instructions
How to set up your email connector for Google Workspace
Sign into your Google Workspace administrator user at https://admin.google.com.
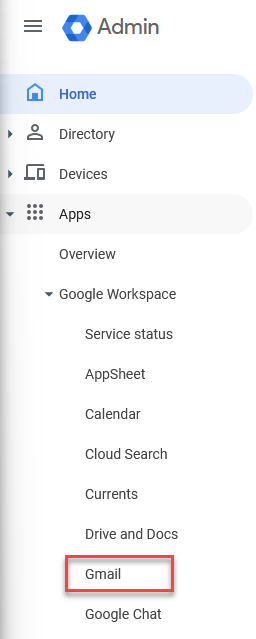
On the left-hand side select Apps > Google Workspace > Gmail:
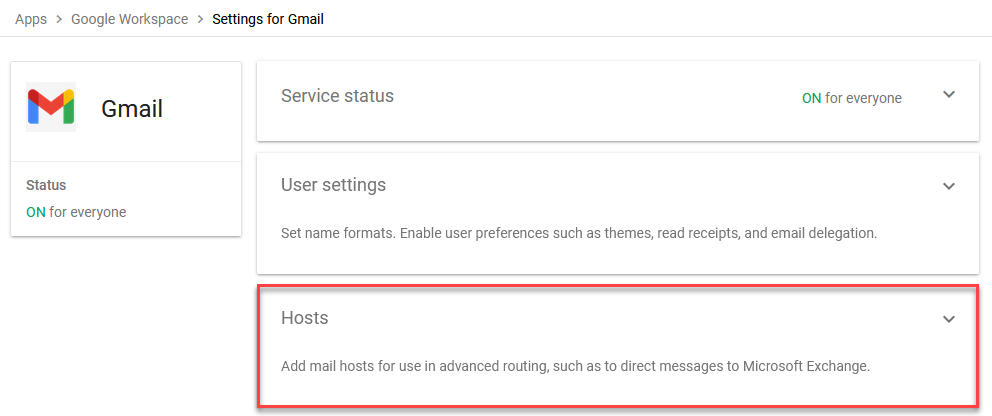
On the Settings for Gmail page, select Hosts:
Within Hosts select Add Route.
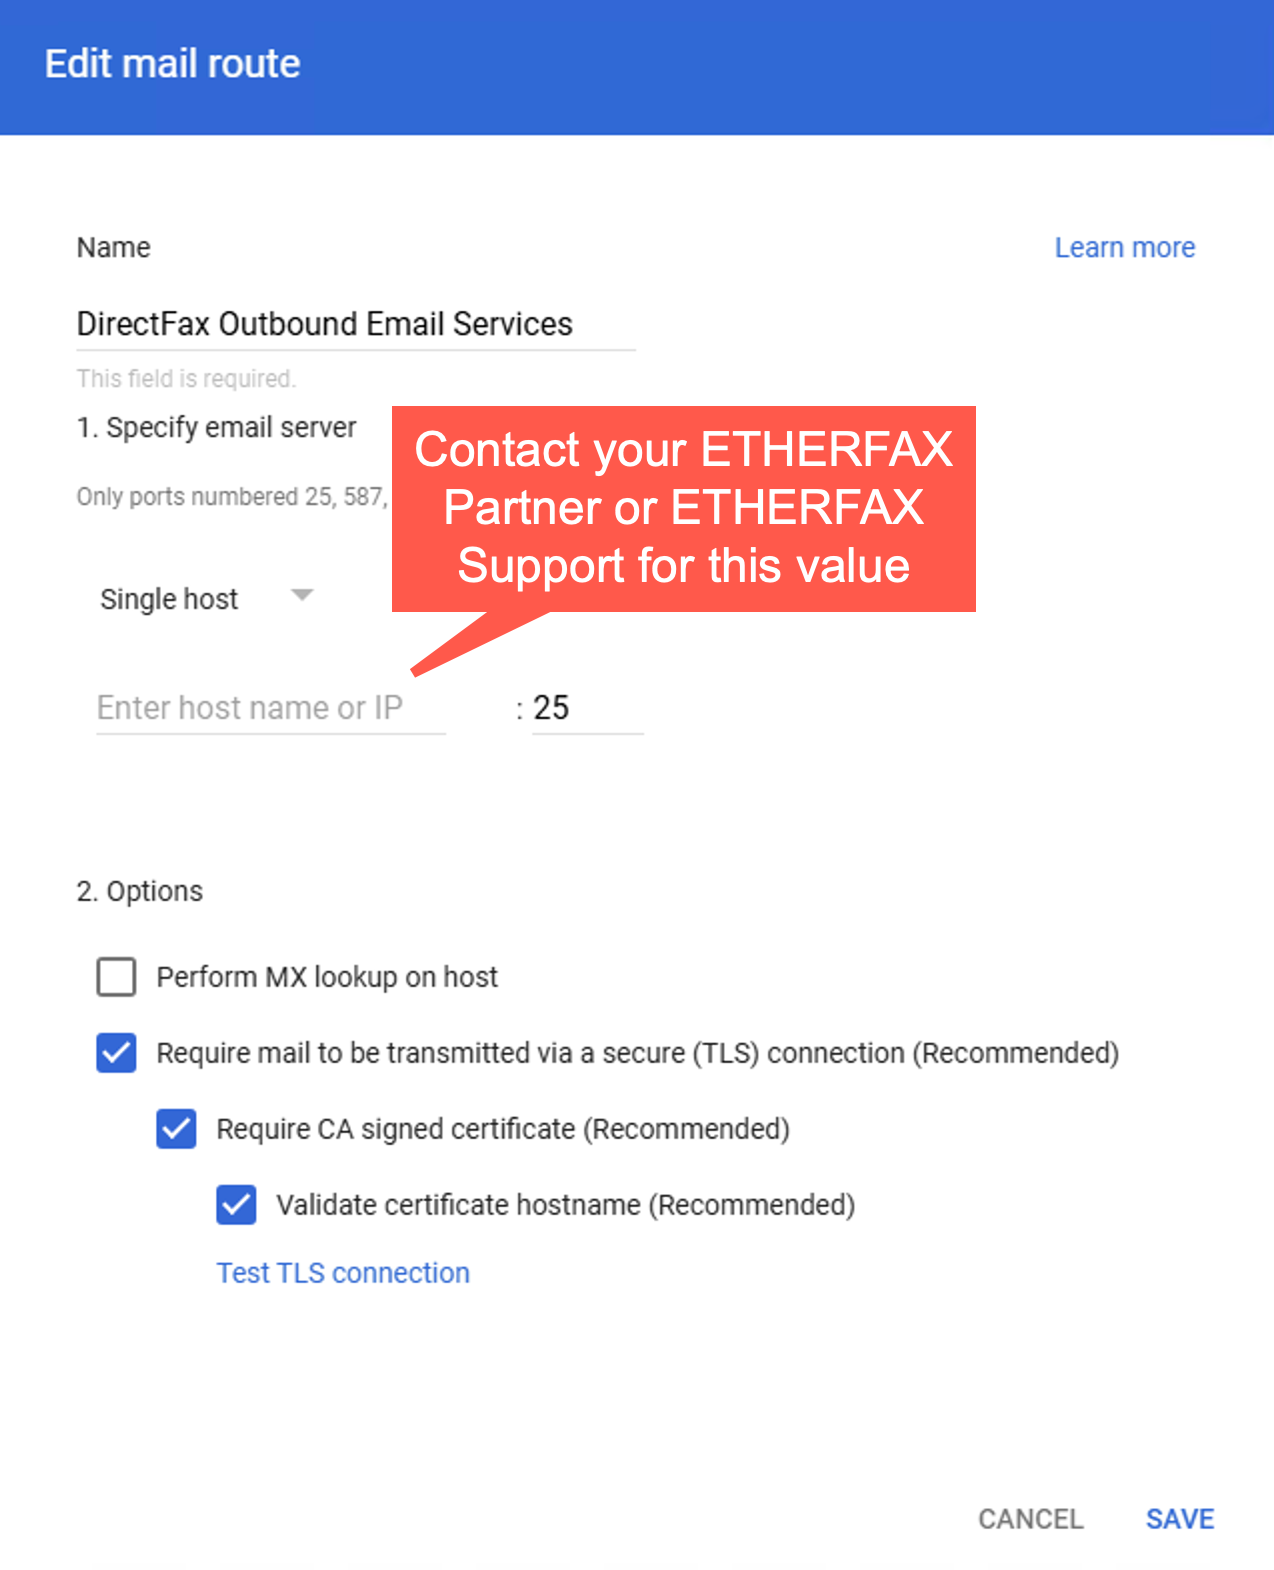
In the Add mail route pop-up, name your connector and provide the Single host value along with a port value of 25 (followed by the colon) while leaving the check boxes on that relate to TLS connections/certificates:
Revisit Apps > Google Workspace > Gmail as performed in Step 2. At the bottom of the page select Routing.
Within the Routing section select Add Another Rule. Enter one of the following values for Routing within the pop-up dependent on your region.
If you are in the United States, enter directfax.net
If you are in Canada, type directfax.ca
Under Email messages to affect select Outbound:

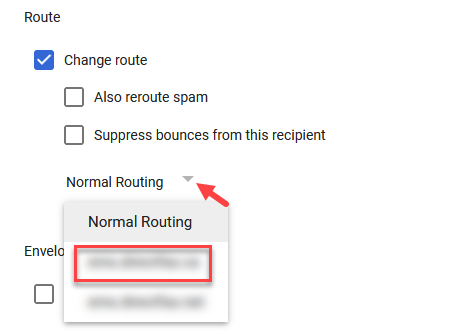
Leave the other values blank and scroll to Route within the pop-up. Select the toggle to Change Route and then select the drop-down on Normal Routing. Select the value provided by etherFAX referenced in Step 4:
Scroll down further until you reach the Show options button and click it. Under Account types to affect make sure that Users, Groups and Unrecognized / Catch-all is selected.
Below, within Envelope filter select the checkbox to Only affect specific envelope recipients. Select the drop-down and change it from Single email address to Pattern match.
Within the Regexp field, enter the following value verbatim:
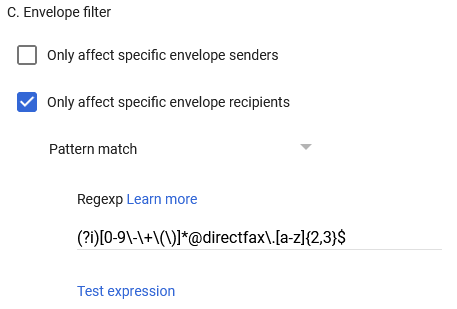
(?i)[0-9\-\+\(\)]*@directfax\.[a-z]{2,3}$
When complete, click Save.
You have now successfully completed your Google Workspace for DirectFax Outbound Email Services!
Ending Notes and Details
To successfully begin sending faxes as performed by the instructions here: How to Send a Fax via Email using DirectFax Email Services, an Email Domain for this tenant must first be validated within the etherFAX portal as performed in the instructions here: How to Add your Email Domain for Outbound Email-to-Fax.