
How to Create an Entry for Inbound Fax-to-Email
This tutorial provides instructions on how to add and register an email address for fax-to-email through DirectFax Email Services.
Info, Notes and Warnings
The ability to add fax-to-email entries requires a EULA along with a billing agreement. If you are unsure, please contact the ETHERFAX Sales team at sales@etherfax.net.
This describes the inbound-only process of creating a fax-to-email endpoint. Please note that this does not regard an outbound email-to-fax workflow.
The link to confirm registration expire after 24 hours. Please time the creation of the fax-to-email entry accordingly with this fact.
Prerequisites
Before reading these instructions be sure that the following prerequisites are met:
An ETHERFAX account.
An ETHERFAX portal user.
The Global Administrator, or
one with the Edit Customer role.
A DirectFax Email Services billing agreement.
Instructions
How to create an entry for inbound fax-to-email
Sign into the ETHERFAX Client portal at https://clients.connect.etherfax.net.
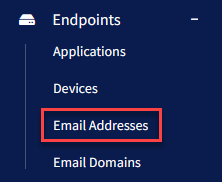
Under Endpoints, select Email Addresses:
In the upper-right corner, click the + Email button.
Fill out the details on the entry you are creating for.
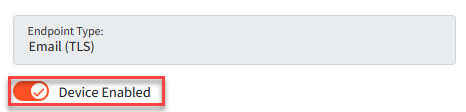
Of the Endpoint Types — Email (TLS) is most popular choice as well as being the easiest to deploy.
Usage of Email (S/MIME) requires access to an email server, involves certificate creation/management and is more complex.
Once complete, click Save in the bottom-right corner of the page. You will then be taken to the Edit Endpoint page.
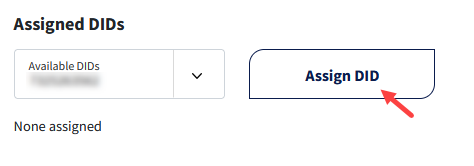
Select one of the Available DIDs, then click Assign DID to pair the number to this entry:
Confirm that Device Enabled is toggled on, then click Save:
A verification email will be sent to that email address from _Alerts@etherfax.net.
If you do not see this email, be sure to check your spam/junk folder or check the spelling of your entry.
The link to register expires after 24 hours.
Contact your email team if you are having issues receiving the email.
If they cannot locate the attempt where the spelling of your entry looks correct, please contact ETHERFAX support at support@etherfax.net.
Once following the link has completed, revisit the entry in Endpoints > Email Addresses. The Registered column will populate with the date.
You have now successfully created a fax-to-email endpoint!
Ending Notes and Details
If there is an intention for the inbound fax-to-email endpoint to have multiple email addresses receive the faxes assigned to the created endpoint, then simply create an email distribution group within your email system and register that address using the instructions above.
Once validated, the distribution group will receive faxes from ETHERFAX and distribute copies to the users within that group.
The email team can bring in users or remove users from that group and manage it entirely within the email system.
As a reminder, this does not regard an outbound email-to-fax workflow.
For more information about an outbound email-to-fax workflow, the following knowledge article will assist: How to Send a Fax via Email using DirectFax Email Services.