
How to Enable/Disable a Route
This tutorial provides instructions on how to enable or disable a route on your etherFAX account.
Info, Notes and Warnings
Please exercise extreme caution when performing this activity as disabling a route rejects all incoming calls to that route by busying them out.
Prerequisites
Before reading these instructions be sure that the following prerequisites are met:
An etherFAX account.
An etherFAX portal user.
The Global Administrator, or
one with the Edit Customer role.
A route.
Instructions
How to enable/disable a route
Sign into the etherFAX Client portal at https://clients.connect.etherfax.net.
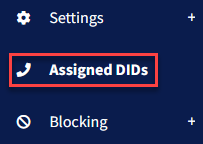
On the left-hand side, click on Assigned DIDs:
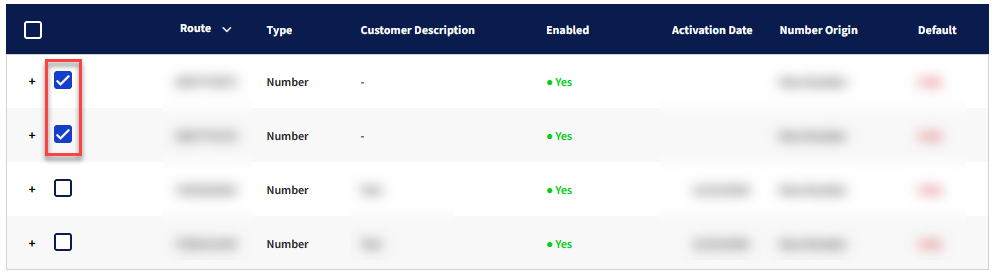
Click the checkbox on the route(s) you would like to enable or disable:
Within the Bulk Operation drop-down, select Enable / Disable DIDs. Select the Enable checkbox if you’d like to enable the route(s), leave it untoggled if otherwise. Click Apply Change:
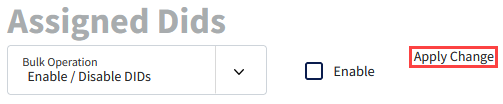
In this example, we are disabling a route by making sure the Enable checkbox is not selected:

The route has now been successfully changed—The Enabled column will reflect the status change.
Ending Notes and Details
An additional reminder that disabling a route on your etherFAX account will busy out all incoming faxes.
If the desire is to block a particular caller via Caller ID, then the following knowledge article will assist: How to Block a Sender by Caller ID.